The OneDesk Customer Portal provides an easily accessible space for your customers to submit tickets and view the status of their items which your team is working on. To get started with the Customer Portal, customers must first be created in OneDesk and invited to register on the portal.
Creating Customers in OneDesk
There are a variety of ways to get customers into your OneDesk account. For example, you can manually add customers with the “Add” button at the top of the screen, import customers from a file, import customers through an integration, or have customers automatically generated by auto forwarding emails sent to your support email to a ticket creation address in OneDesk.
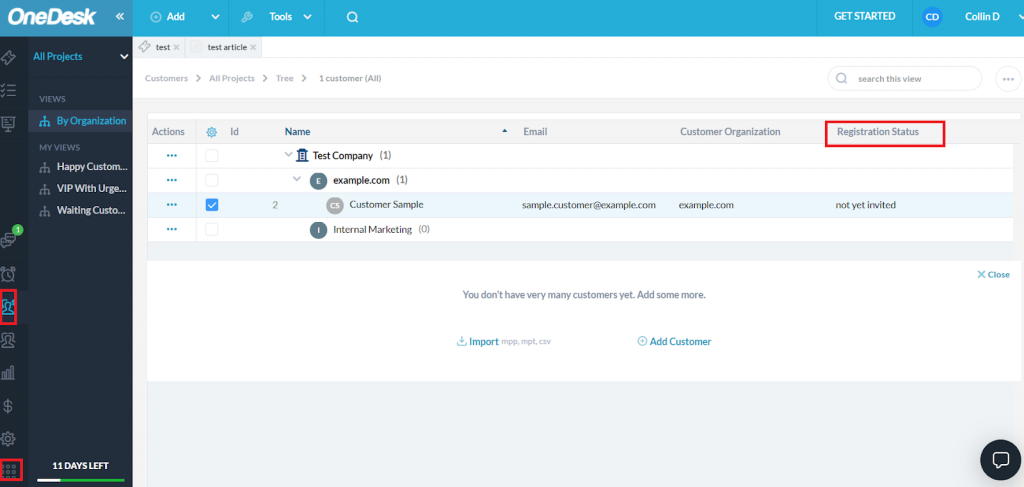
Once customers have been created in OneDesk, access their customer invitation options from more applications -> customers . You can see whether they are invited to the portal or not in the default view.

Inviting Customers to the Portal
If a customer is not yet invited who you wish to invite, either select the customer and then the three dots in the “Actions” column and select “(Re)invite customer”,
Or double click on the customer and select “send invitation”:
An email inviting the customer to join the portal will be sent to the email which is associated with their account.
The customer will then need to complete registration on their end and can then access the portal by logging in with these credentials on the widget, or from the portal’s access URL (if a login is specified as required in your portal settings).