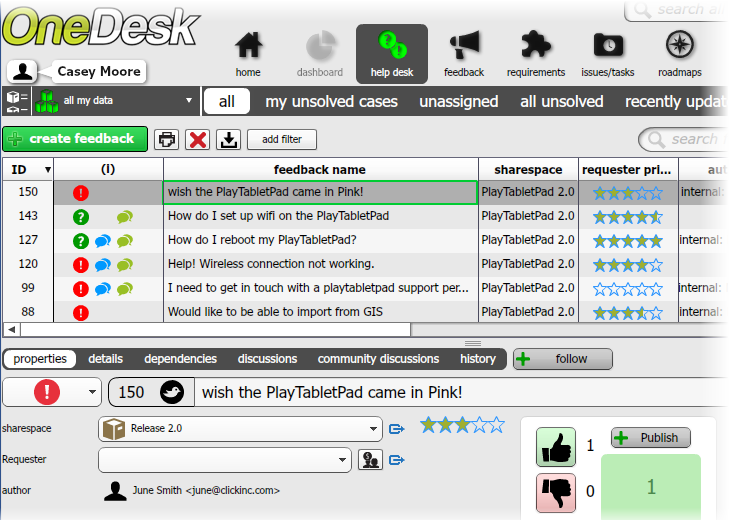
With OneDesk, the customer service, help desk, or case management process is easier.
We at OneDesk recognize that many companies face the challenge of gathering and sorting out a large amount of support cases. OneDesk allows you to capture support cases and easily manage them. You can also filter and sort your support cases using a flexible and extensive set of stacked filters; this makes it easy to find what you are looking for.
Managing support cases
OneDesk’s help desk application allows you to gather all your support cases in one place, regardless of how they were submitted.
When customers send an email to to support@(your organization).onedesk.com, they will arrive in the help desk grid (shown above).
Customers can also submit items via the customer portal. Items categorized as questions or problems will show up here.
You can also manually enter items into the help desk grid. Likewise, you can tag social media comments as questions or problems, and have them show up in the help desk grid.
Once items are in the help desk application, you can enter properties, details, and start discussions about them. Best of all, all questions and problems can be assigned to a team member to be worked on. OneDesk’s help desk application is seamlessly integrated with all of the software’s other application. They can be brought into a sharespace as feedback, turned into requirements, linked to tasks, and be implemented in no time.
Filtering support cases
This allows you to filter your support cases and pull up the ones that are important to you. Search based on many criteria such as name, description, lifecycle status, creation date, last response date, percentage complete, customer priority, number of votes, and more.
How to filter your support cases:
(1) Go to the help desk view.
(2) Click add filter.
(3) A window will appear. Click the drop-down arrow and select the criteria of the cases you wish to find.
(4) Once a criteria is selected, other fields may appear in order to make your search more specific. Fill out all required fields. (4)
(5) Click add.
Keep adding as many filters as you wish. For example, you can search for all cases created after a certain date, with a customer priority of over 3 stars.
You can save your filters by clicking on saved views and selecting save this view. When you do so, the filtered search results will be updated with any new feedback matching the search criteria.
