OneDesk’s customer portal allows you capture customer ideas, feedback, questions and compliments. Contrary to with traditional surveys, the customer portal allows your company to capture customer feedback without them falling through the cracks. When sent through the customer portal, submissions arrive in your OneDesk account, directly to the appropriate applications, where you can immediately begin work on them.
Simply send customers the link to your customer portal, or embed it in your website.
Use the instructions below to help guide them through using the customer portal.

When you invite customers to submit feedback, they will receive an email from OneDesk, inviting them to submit feedback to your organization.
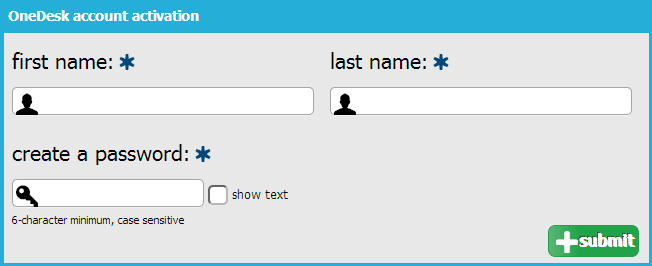
As soon as they click on the link in the email, they will be taken to this page, where they will need to provide their information and create a password.

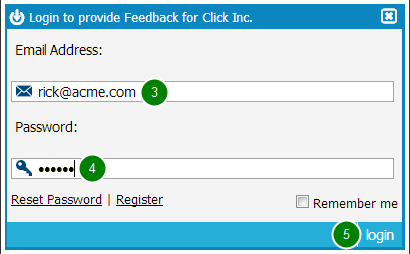
To submit feedback, customers should first login (1) or register (2) if it’s their first time.
Of course, you can choose whether customer need to be invited before they submit feedback, whether they can submit feedback without registering, or whether they can self-register.

Customers simply need to enter their email (3) and the password they created (4).
They can then login (5).

Once logged in, customers can:
– Submit feedback (1).
– View feedback (2).
– Vote feedback up or down (3). Note that if they have already voted, they will no longer be able to vote (4).
– Discuss feedback (5).
– Clicking on the feedback will allow them to view any attachments (6).
– View the feedback’s priority (7).
– View the feedback’s lifecycle status (8). Note that keeping your customers updated on their feedback’s status is recommended, but optional. Choose whether they can do this when you set your customer feedback preferences.
– View only the feedback they have submitted (9).
– Answer polls that you have created (10).
How to submit feedback

Click on the submit feedback field (1)

Then, customers need to:
– Enter a title for their feedback (2).
– Specify the type of feedback (3).
– State its priority (4).
– Optionally add attachments (5).
– Describe their feedback (6).
– Optionally set custom fields (7).
– Submit their feedback (8).
The feedback they submit will arrive in the appropriate application in your OneDesk account.