Connecting a helpdesk to your Asana
This guide will walk you through a simple integration process to connect a helpdesk to your Asana account. This will let you better, and simplify your daily work.
Pre-requisites:
-A OneDesk account (even our trial version works too!).
-Your Github account.
-A Zapier account (the free version should be more than enough).
-The Private link to access our OneDesk app in Zapier:
https://zapier.com/developer/invite/42966/4e4907110b905debeb6a129130fa5c0b/
The basic principles of the integration:
To make this happen, you will need to use Zapier. This online tool makes it possible to connect the two applications with a simple and very malleable formula. It goes a little bit like this: If this takes place in the first platform, then execute this action in the second platform.
Because of the simple way this formula is designed you can recombine it any which way with all the applications available to you. The two steps are called the Trigger and the Action.
Today we will be connecting our Asana account with our OneDesk account.

What you can do with this integration:
The different integration combinations available can represent a variety of useful workflows.
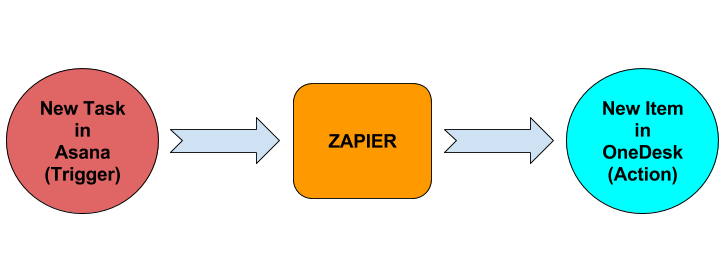
We focus on this particular type of integration, namely: When a new task is created in Asana, create a new item in OneDesk.
But there are many more integrations possible between Asana and OneDesk. For example:
→ A new user in Asana, create a new user in OneDesk.
→ A new project in Asana, create a new container in OneDesk.
→ A new comment on a task in Asana, update the item details in OneDesk.
The idea is to make the platforms speak to each other and simplify your work with automatic data input!
How to connect a helpdesk to your Asana:
First, go on the Zapier site (having used our top secret link to get access to the OneDesk application on there) and find the “Make a Zap button”.
The next step is to select two applications to create the formula. In this case the trigger application is Asana and the action application is OneDesk. In that order, when something happens in Asana, then something will take place in OneDesk. You can choose to reverse this for new or other integrations you have planned.
The process from there is pretty simple, simply select Asana, then select what you want the trigger to be (in this case a new task). Log in to your account through the Zapier site and test to see how it all works.
Then do the same with OneDesk, pick the app, pick the thing you want the action to be (in this case, a new item), then log in and choose what information you want to carry over to have it automated the way you want it.
Then test it all over again and make it active by switching on the slider at the top right.
You can also name this integration to better keep track of them if you’re planning on making a few others! To find out more about the different applications that we support integrations for, or how to set those up, look on our website or book a demo with us.
Photo Credit: “Knit Merino Wool” / Markus Spiske / CC BY