It’s common when managing projects that you need to sign-off with a client. For example, you might need them to approve a mock, document, or decision. Many companies do this with an informal message or verbal acknowledgement. This causes problems later. Who actually signed off on the decision? When? Which exact changes are required? This is why it helps to implement a formal process. At the same time clients don’t want to take too many extra steps.
That’s why we’ve built a way to get approvals that’s easy for both you and your clients.
What exactly is an Approval Process?
In simple terms, an approval process is just a formal way of saying, “Is this okay to move forward?”
Instead of a vague answer in a Slack message, an approval process creates a clear, documented “Yes” or “No” for a specific piece of work. It keeps everyone on the same page and ensures no one starts the next phase of a project until the current one is officially signed off.
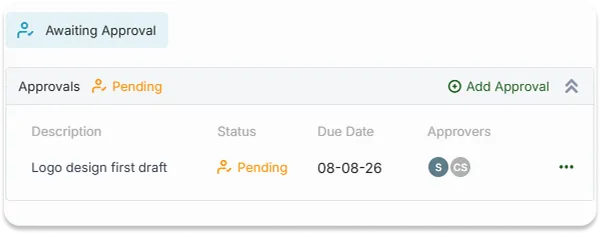
Step 1: Create an approval (on anything!)
Whether you’re working on a quick support ticket, a specific task, or a massive project milestone, you can attach an approval request to it.
In OneDesk, you don’t need a separate “approvals” tool. Just click into the item you’re working on and hit “Add Approval.”
Step 2: Set the stage
A “yes” is only as good as the information the client has. When you create an approval, you can add all the context they need:
- Description: Tell them exactly what they’re looking at and what you need from them.
- Files: Attach the latest designs, docs, or spreadsheets so they don’t have to go hunting.
- Due Dates & Reminders: Set a deadline. If they haven’t responded, our system will send a friendly “nudge” automatically so you don’t have to chase anyone down.
Step 3: Track everything from your dashboard
Stop clicking through every single task to see who hasn’t replied yet. Your main dashboard has a dedicated “Requested Approvals” widget.
At a glance, you can see what’s waiting, who’s holding it up, and how close you are to the finish line. This is an easy way to keep your projects from stalling.
Step 4: The decision
When you request an approval, they get a clear email with all the approval details. They just click Approve or Decline directly. If they have thoughts, they can type a quick comment right there, too.
Step 5: Automatic record-keeping
As soon as the client clicks that button in their email, the magic happens in the background.
Their decision is recorded with a timestamp. Any comments they made are added directly to the task or ticket. You get a perfect audit trail without the manual work of updating spreadsheets or copy-pasting emails.
Make it easier for your clients to say yes so you can get moving with your projects with the help of OneDesk.
Want to see it in action? Sign up or book a call with our team at OneDesk.